Sensor
The sensor ships preinstalled on a purpose built network appliance. Most of what an administrator does with it is wiring, registering it to a facility, and confirming it is reporting. The appliance updates itself, there is no package to upgrade by hand.
Read Planning first if you have not already, it settles the network access this page assumes is in place.
Install
Identify the appliance’s ports. The exact count and labelling depend on the model, but every model exposes the same three roles: management, OT network, and port mirroring.
The OT network connection is what lets the sensor ask devices for their model, firmware, and serial number rather than only observing them in mirrored traffic. See Planning for what each connection needs.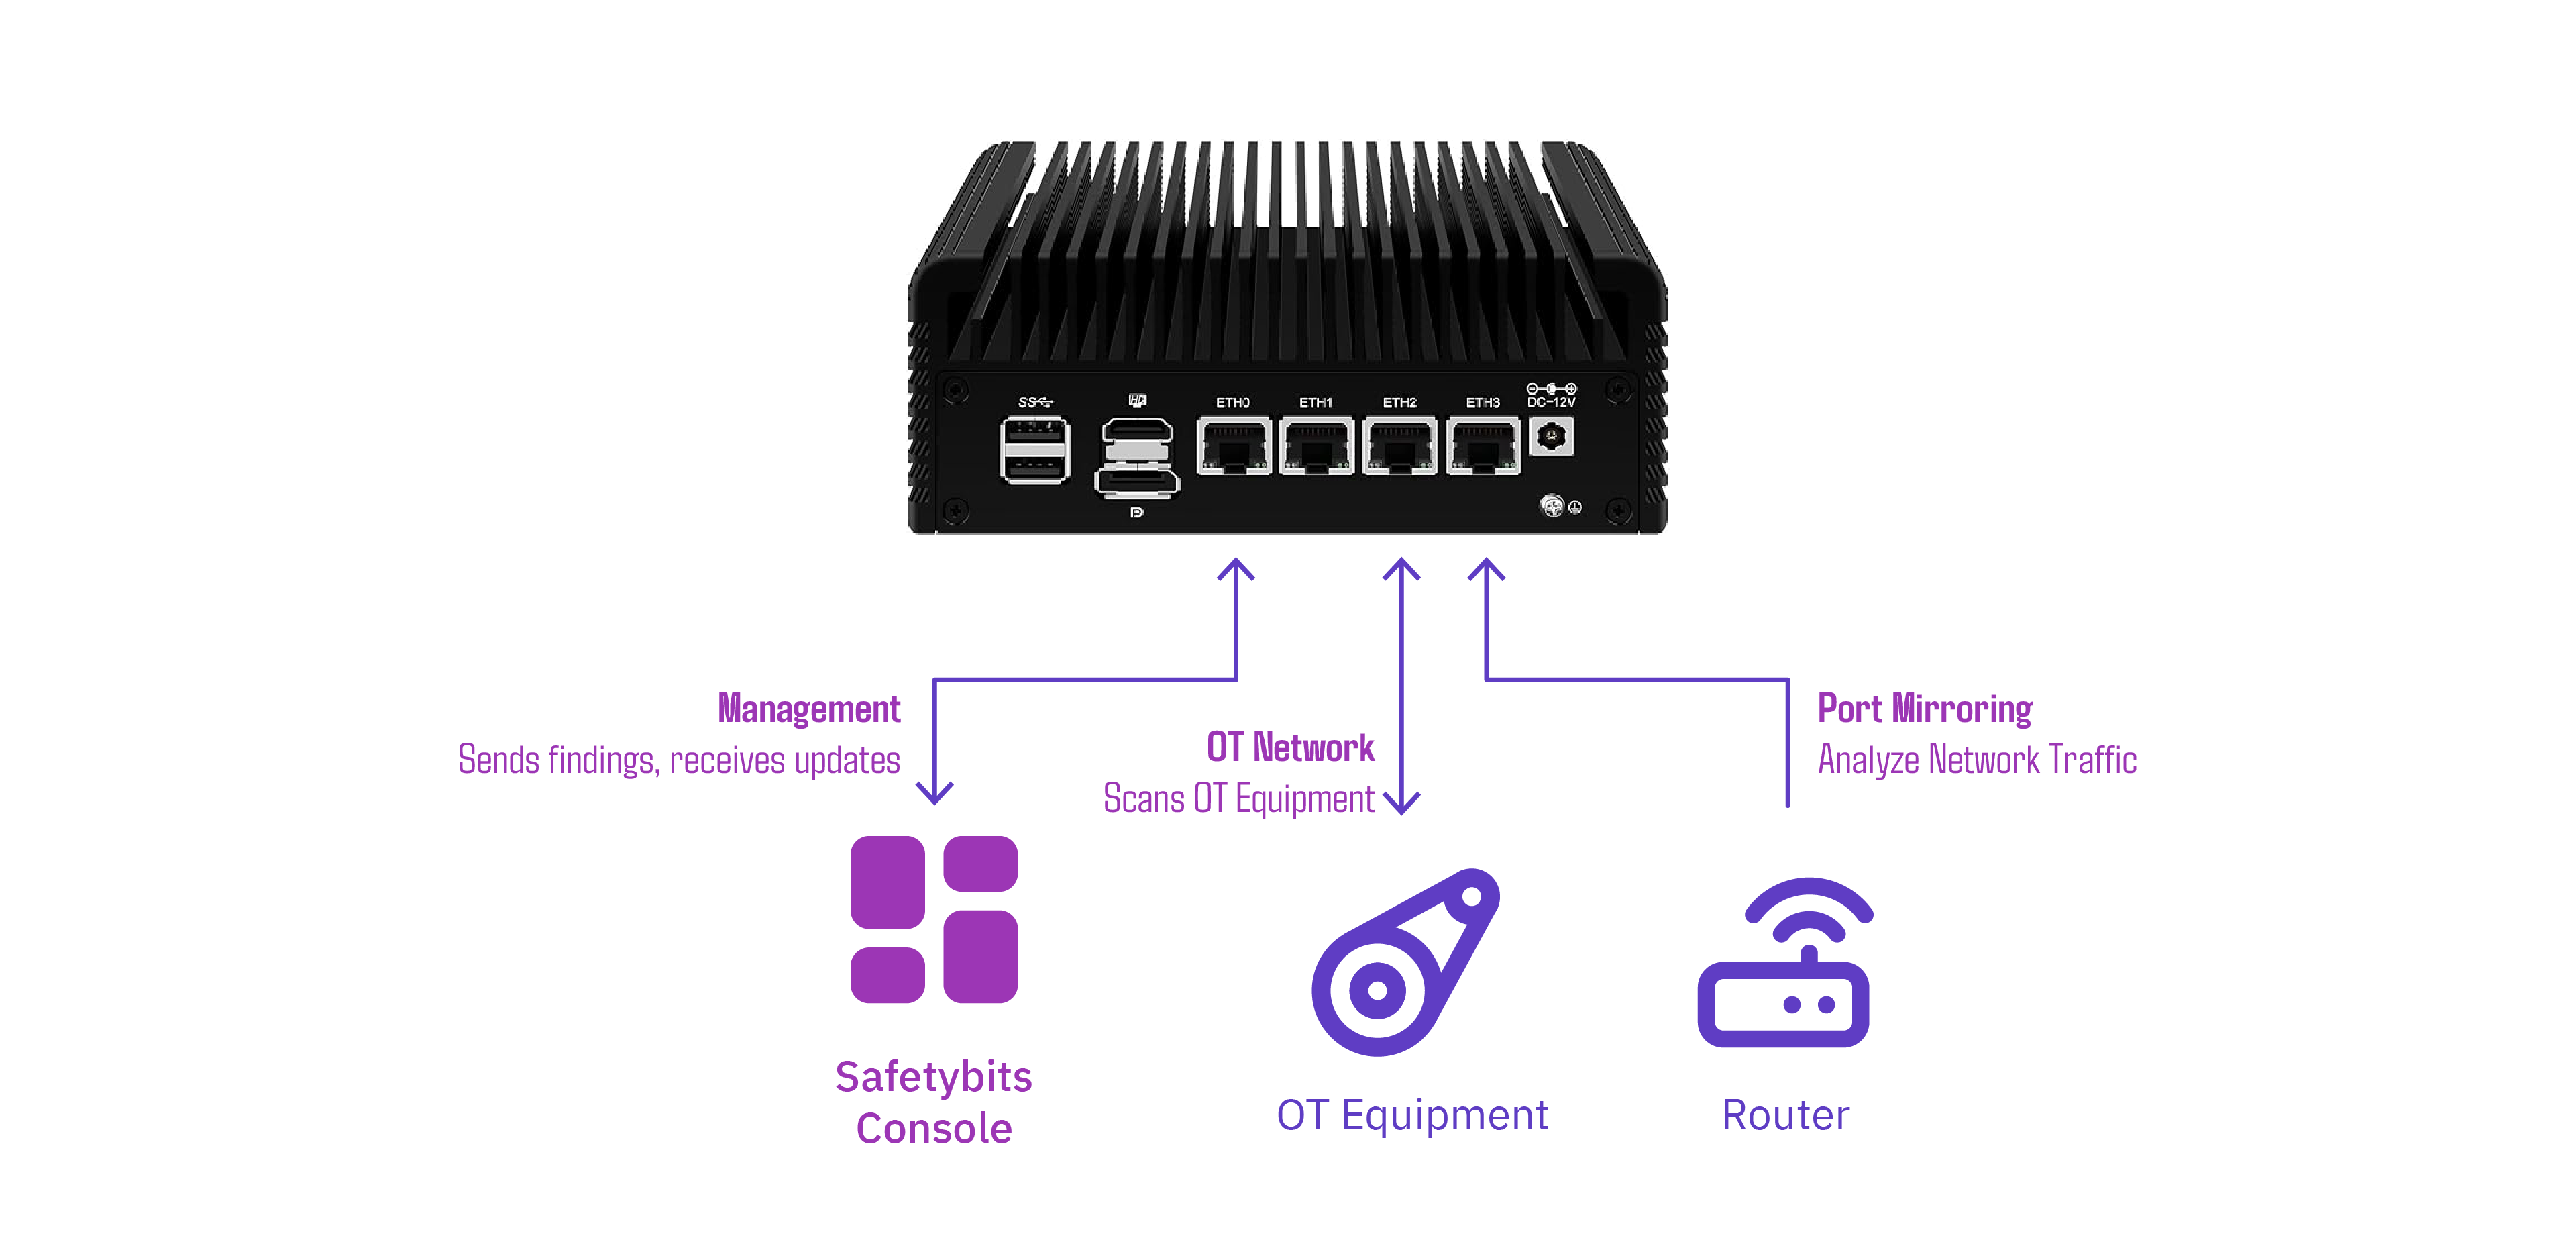
Connect each port to the network it corresponds to, using the labels shipped with the appliance.
Connect the port mirroring interface to the switch port carrying the mirrored (SPAN) traffic. See Port mirroring and SPAN below for what that switch side configuration needs to provide.
Power on the appliance and confirm link lights are active on every connected port.
Register the sensor
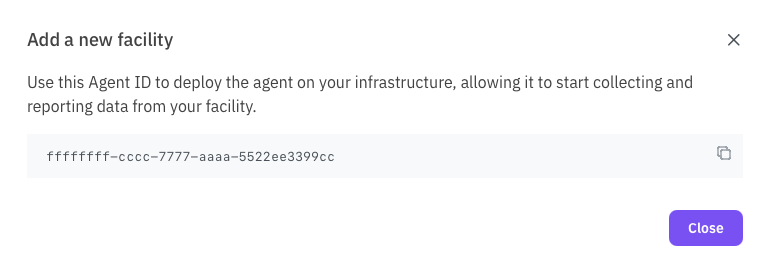
The appliance needs a sensor ID before it can report anywhere. Get one from the console:
In the console, open the account menu (top right) and click Add Facility.
Give the facility a name and confirm.
The console shows the sensor ID once, labelled Agent ID on screen. Copy it now, there is no other screen that shows it again.
Configure and start
Connect to the appliance with the credentials support provided.
Open
/etc/safetybits, the sensor’s environment file. SetAGENT_IDto the value you copied from the console:AGENT_ID=ffffffff-cccc-7777-aaaa-5522ee3399ccThis file holds one
KEY=VALUEpair per line, with no quoting and no spaces around the=. See Sensor configuration for every setting it accepts, including which ones are required.Restart the sensor to pick up the change:
sudo systemctl restart safetybits
Verify it is reporting
Once the sensor starts, go to the facility’s Overview dashboard in the console. Last check-in and Sensor version confirm the appliance reached the console at least once. Devices then start appearing in Inventory as the sensor finds them, see the quickstart for what to expect during that first window.
If Last check-in never updates, see Troubleshooting.
Port mirroring and SPAN
The sensor only sees what the mirrored port sends it. Whoever manages the switch needs to mirror every VLAN or port carrying traffic you want visibility into onto the port the sensor’s port mirroring interface is connected to. Missing VLANs or one direction of a link mirrored but not the other both show up as gaps in coverage rather than errors, see Network traffic and flows for how the sensor uses this feed. Sensor configuration has switch specific port mirroring recipes.
VLAN access
If the OT network connection needs to reach a tagged VLAN rather than an untagged access port, the appliance’s OT network interface needs a matching VLAN sub interface before active identification can reach that segment. Sensor configuration has the steps.
Monitoring and metrics
The appliance monitors itself. A local Prometheus instance scrapes the sensor’s own metrics and the host’s system metrics, and a bundled dashboard at http://<appliance-address>:8080 visualizes both. Use it to check the appliance’s own health, CPU, memory, and packet handling, separately from what the console reports about the facility.
Upgrade
There is nothing to run. The appliance checks for a new sensor image on its own roughly every eight hours and restarts the sensor service when one is available. Check the release notes after an upgrade if you want to know what changed.
Uninstall
Power off and disconnect the appliance. There is no self-service way to delete a facility from the console, contact Safetybits support to decommission it on the account side.